When I first started making electrostatic cells I used epoxy, specifically Devcon 2 Ton epoxy. This was the glue that was recommended in Roger Sanders' articles; in fact, I believe he states in one of these articles that epoxy is really the only adhesive that can be used for this purpose. The reason for this assertion is that air circulation is required for other adhesives to cure, whereas in ESL fabrication we press things together so tightly that air cannot get to the glue. Therefore epoxy, which does not require air to cure, is the only choice.
Unfortunately, there is a problem with epoxy. It works fine to bond the stators to the plastic insulators, but it does not bond very well to the diaphragm. It can work, and I was able to make cells that lasted for years, but there was a high failure rate, and I had to be very careful not to accidentally detach the diaphragm from the plastic insulators.
Instead, I recommend using polyurethane glue. There are many different varieties of polyurethane glue, for example Gorilla Glue and Elmer's Ultimate Glue; unfortunately I have not done much experimenting to identify which brands will work well for ESL fabrication. Instead I use a polyurethane glue available from ER Audio; it is expensive, but I know that it works well. Even if you don't buy their glue, you should look around their site since they specialize in electrostatics and carry many items that are of interest to ESL hobbyists.
ER Audio actually carries two different kinds of polyurethane glue for electrostatics, and I have tried both of them. There is one available in a 100ml bottle simply called Polyurethane, and another glue in a 20g applicator bottle that is referred to as Diaphragm Adhesive. The Diaphragm Adhesive will bond the diaphragm to the stators, but it tends to come out in big drops and I find it difficult to control during application. The 100ml Polyurethane, on the other hand, will bond both diaphragm to spacer and spacer to stator quite well, so I ended up using the 100ml Polyurethane glue exclusively.
The only problem with the 100ml Polyurethane is that ER Audio delivers it in a bottle without any applicator tip. The reason is that they expect the glue to be poured out and applied with rollers. To me, this method would be messy and wasteful of glue; what I want is to apply a very thin bead in the areas to be bonded.
My solution was to buy the 100ml bottle from ER Audio but to transfer it to another container as soon as I received it. You need to do this quickly since you don't want to expose the glue to air for very long. And it is also a good idea to do this in a well-ventilated area and wear a respirator since you will be exposed to a lot of fumes from the glue (this is about the only time I wear a respirator when using this glue, since the tiny amounts applied during gluing steps don't seem to bother me - however you should always wear protective gloves when there is any chance that the glue could come in contact with your hands). I use as large a funnel as possible to transfer the glue, since it is very thick and will pour slowly if constricted. Once the glue is transferred, it is a good idea to keep the new container inside a zip-lock bag to minimize exposure to the air and prolong the life of the glue. I have found that with these precautions one bottle of glue will last for several months and is sufficient to construct around 10 cells or so.
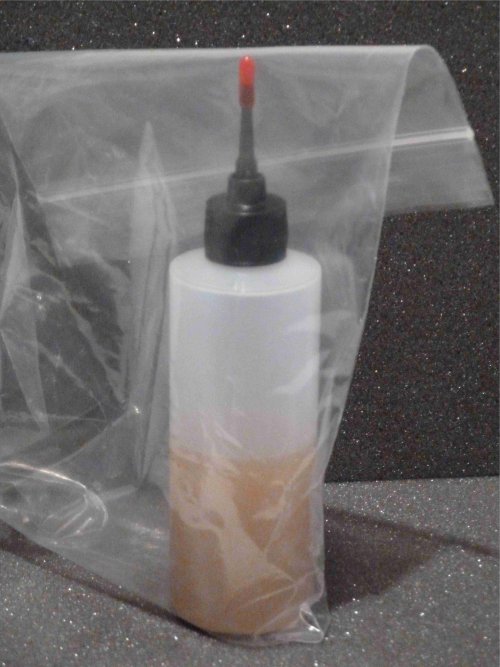
I obtained the bottles I use from Howard Electronic Instruments. I use a 4oz bottle with Luer Lock Cap, part number JG4.0BC. You can also buy extra caps (part number JGC512), which you should since the cap tends to get plugged up after a few gluing steps. In addition to the bottle and cap, you need to buy plastic tapered-tip needles in order to apply the glue. I use the 16 gauge tapered needles, part number JG16-1.25TT, which are grey in color. This needle will allow you to apply a very thin bead of glue, which is all you really need since the glue spreads out when you press the pieces to be bonded together. You need to get extra needles, since they will plug up after almost every gluing step. You may find that you prefer using a different size tip, and Howard Electronics has many to choose from; I doubt that you will want a smaller needle, but you may prefer one with a bigger opening than the one I use. I also ordered rubber tip caps to seal the needle between gluing steps, part number JG125TCP. The photo on this page shows the glue after it has been transferred to the new container (and after some has been used).
Home